December 3, 2021
The holiday season is one that is filled with joy, sweet treats, and annual festivities!
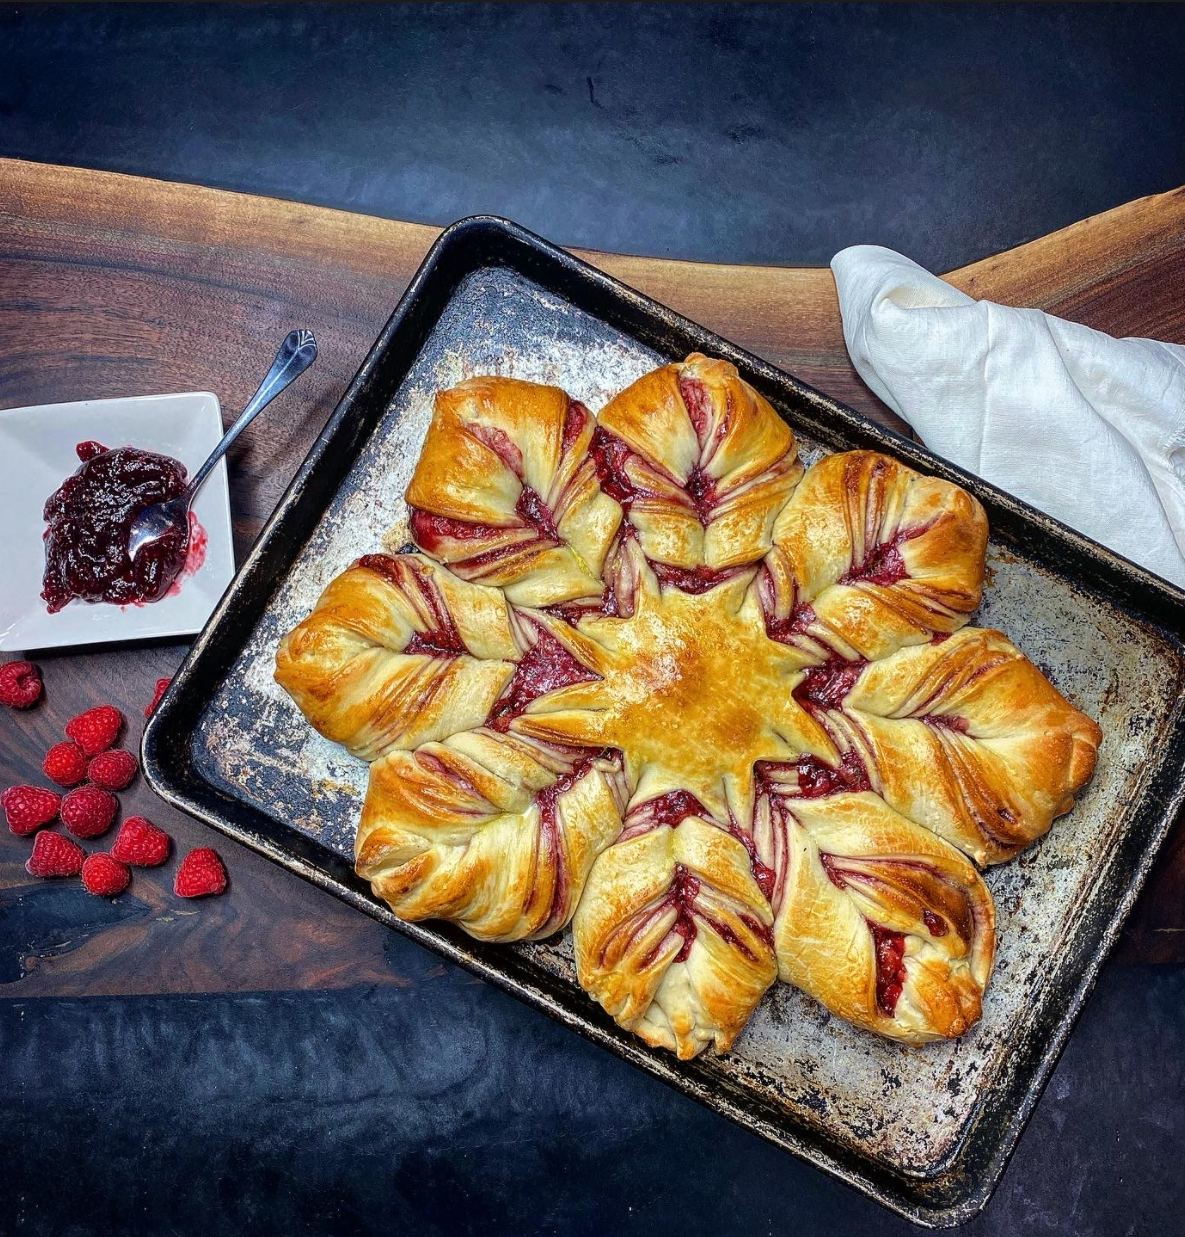
Savor the sweetness of the perfect holiday pastry this Christmas morning with some decadent raspberry star bread!
The holidays represent a very magical time that many people look forward to all year round. Not only is it an opportunity to spend some much needed quality time with friends and family, but it is also the season of giving where the joy of love is celebrated!
People observe the holidays in a variety of ways, each family possessing their own unique traditions and practices with the holiday festivities. Whether you’re looking to shake your holiday routine up, or seeking to begin your own, we have the perfect addition to a magical Christmas morning for you!
For many, Christmas dinner is not the only time designated to enjoy an elaborate spread of incredible food. A table filled with hearty breakfast foods shared with all of one’s closest relatives is an entertaining and adoring way to begin Christmas day. Of course, there are a number of food items that would make this breakfast a spectacular one, but adding a festive touch is a great way to embody the holiday spirit!
This holiday raspberry star bread is that perfect touch! It tastes just as amazing as it looks and is a fun pastry to serve alongside a hearty Christmas breakfast, or even to snack on after a delicious Christmas dinner!
How to Make Raspberry Star Bread
Making this holiday pastry does not require much in the way of effort, however, it does require a decent amount of time to prepare. In fact, most homemade pastries are a time-consuming venture since dough requires a significant amount of time to rise, but this does not have to be a daunting task! The time it takes waiting for dough to rise can be utilized in a variety of ways. You can fill it by preparing other dishes, wrapping presents, filling stockings, or sipping some delicious hot cocoa by the fireplace!
Before we get ahead of ourselves, we have to gather the ingredients! To make the dough for this raspberry star bread, you will need:
- active dry yeast
- warm water
- warm 2% milk
- 1 large egg
- Butter
- sugar
- salt
- all-purpose flour
- seedless raspberry jam
- Confectioner’s sugar
Start by dissolving the yeast in a bowl of warm water until it reaches a foamy consistency. Set the bowl aside and combine milk, egg, softened butter, sugar and salt. Make sure these ingredients are well incorporated and then add in the yeast as well as flour. You can do this step by hand if you would prefer, but using a mixture to beat the mixture until it is smooth may grant more even results in less time. Make sure to add plenty of flour to get the mixture to form a nice dough, which is where the fun really begins!
Once you have made your dough, prepare a counter or tabletop with a dusting of flour and lay the dough out for kneading. Knead your dough for a little less than ten minutes. Your goal is to get it smooth and pliable. Grab a medium-sized bowl and grease the surface before placing your newly kneaded dough into it. You will want to cover the dough in a layer of grease, and the easiest way to do so is by using this bowl method. After placing the dough in, add a small amount of pressure to ensure the bottom side of the dough made contact with the surface of the bowl, then flip the dough over and repeat on the other side.
Next, you will simply cover the dough and place it on the counter (not the refrigerator) to let rise. This step should take around an hour. You’ll know the dough has had enough time to rise once it has doubled in size.
After the hour has passed, use a clean fist to push the dough down and make it manageable again. Lightly flour the surface you would prefer to work on before placing your dough down once more. This time, you will divide the dough into four even sections, rolling each into 12 inch circles. On a greased pizza pan, lay a single layer of the dough out and spread a layer of the raspberry jam over the top. Repeat for the rest of the sections of dough, leaving the last layer bare without jam over the top.
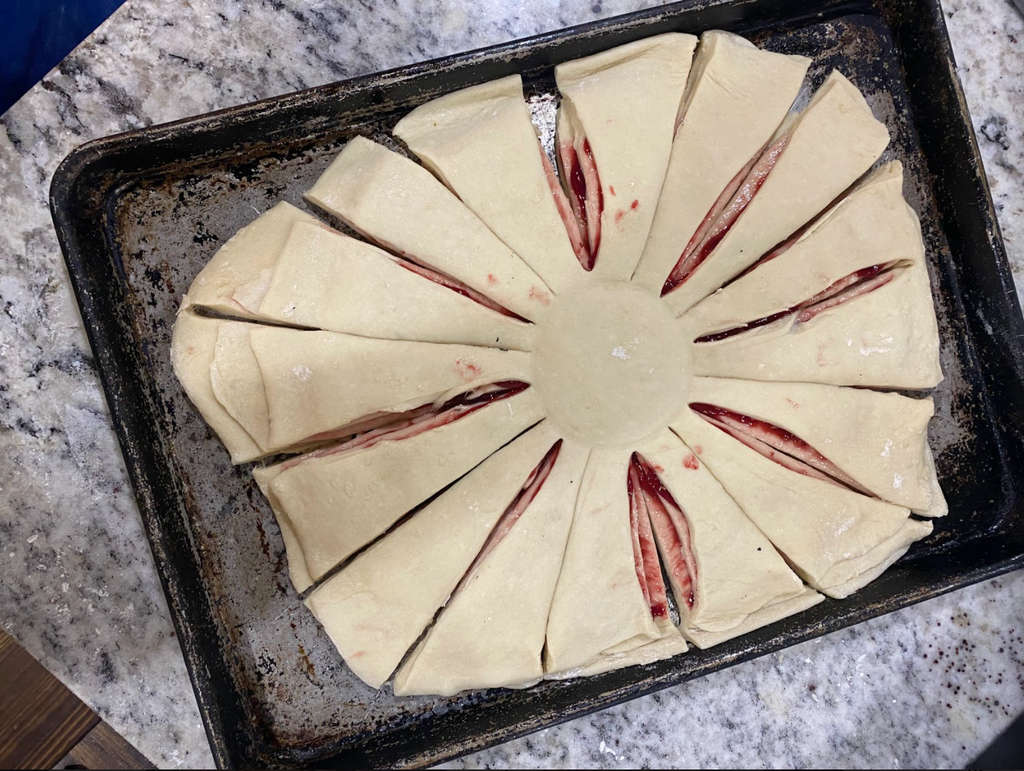
At this point, you will begin the process of making the star shape itself. Using a round cookie cutter or other (clean) circular object, place it gently in the center of your dough stack. You do not want to press down or add pressure to this object as it may pierce the dough and compromise the integrity of your star! Use a knife to place 16, evenly spaced cuts from the outside edge to the center where the cookie cutter or object is, using it as a guide to prevent you from cutting too far inward. Ensure that you are cutting all of the layers of the dough and that the bottom layers are not being missed. Once the cuts have been placed, feel free to remove the cookie cutter or object and free up your work space!
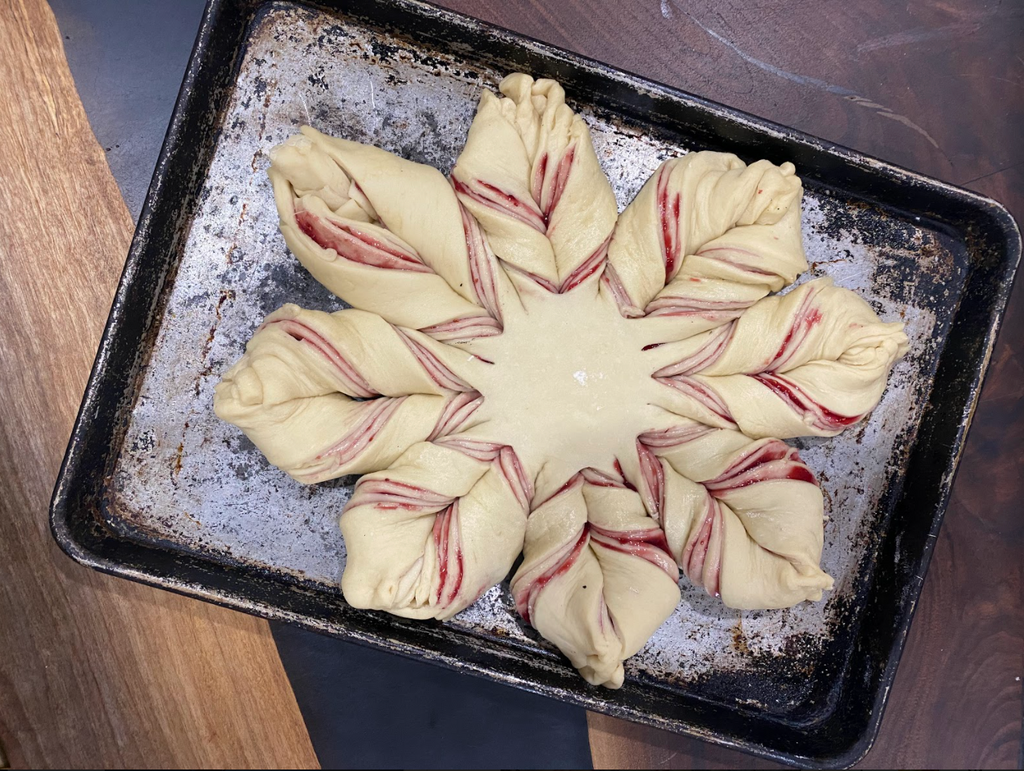
You will have 16 strips of dough, each complete with 4 layers. Twist each strip a few times in the directions pictured above and combine with an adjacent strip by pinching the outside edges together. This step can seem a bit confusing at first, but using the image as a guide should make it a piece of cake! You should end up with 8 points to your star with visible raspberry bands.
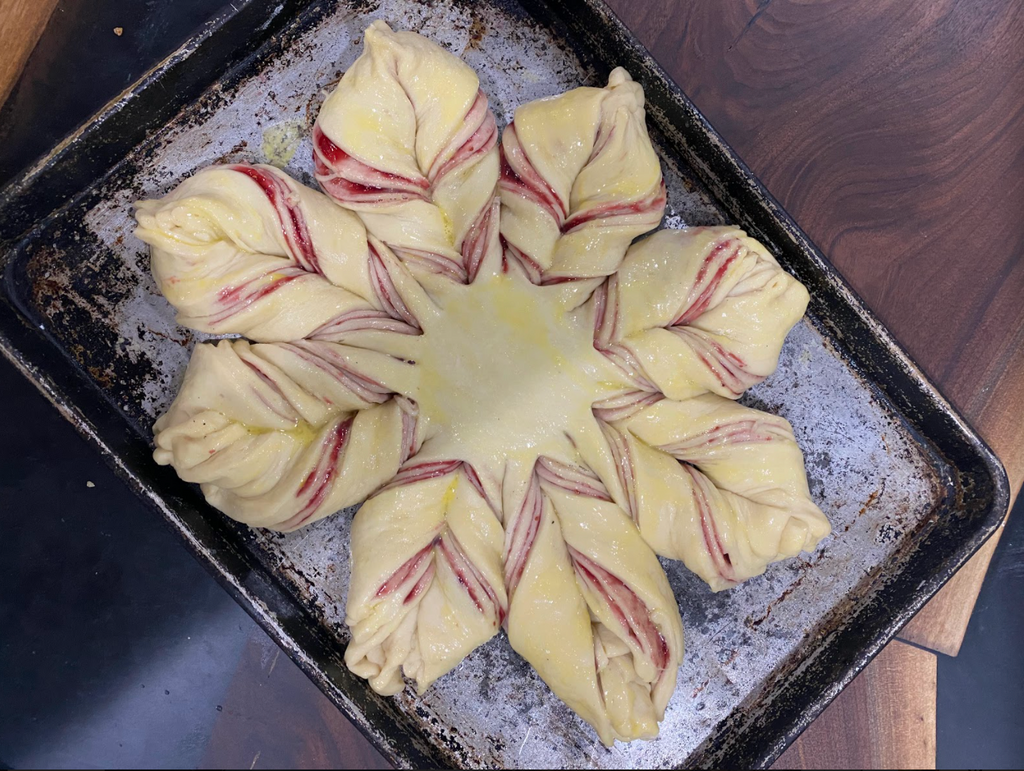
Cover your newly formed star and set aside on the counter for another 30 minutes or so to let rise once again. This may be a good time to begin preheating your oven. You will be baking the bread at 375°F.
After it has had time to rise, brush a layer of melted butter over the top to ensure a delicious golden brown upon baking. (If possible, try to avoid the visible bands of raspberry jam to prevent the jam running in the oven).
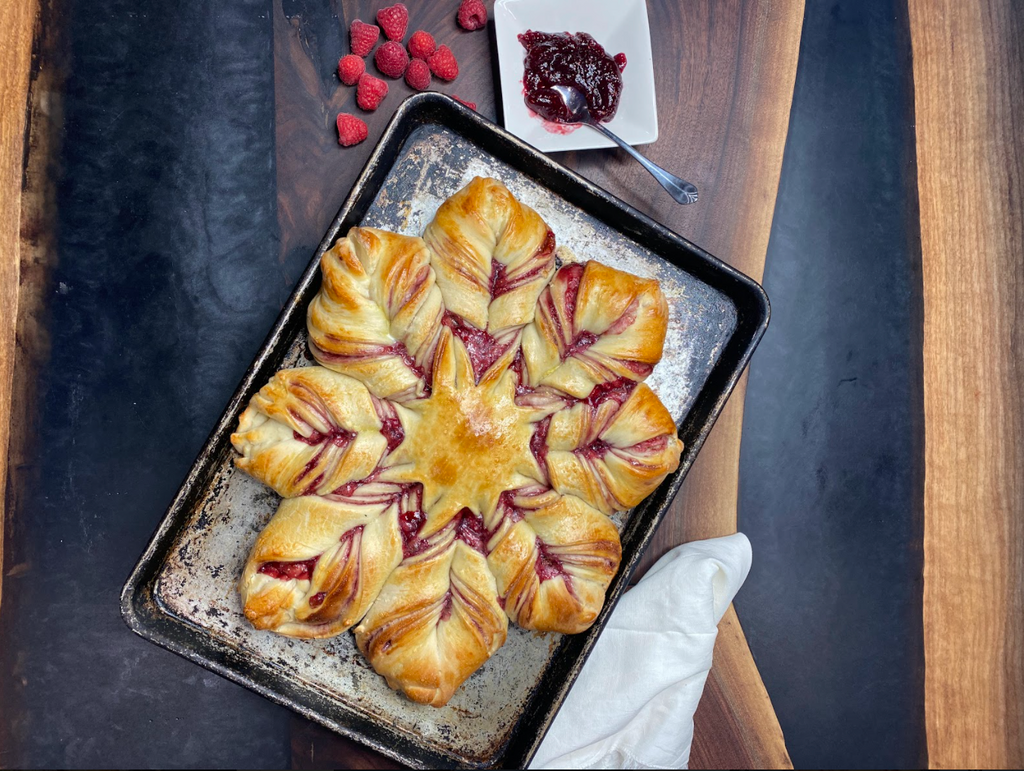
Place the dough into your preheated oven and bake for 18-22 minutes. Towards the end of the estimated bake time, keep an eye on your bread. If you notice any dripping jam or that your bread has goldened, go ahead and remove it from heat.
Brush another layer of the melted butter, again avoiding areas where you are able to see the jam, and let cool completely on a wire rack.
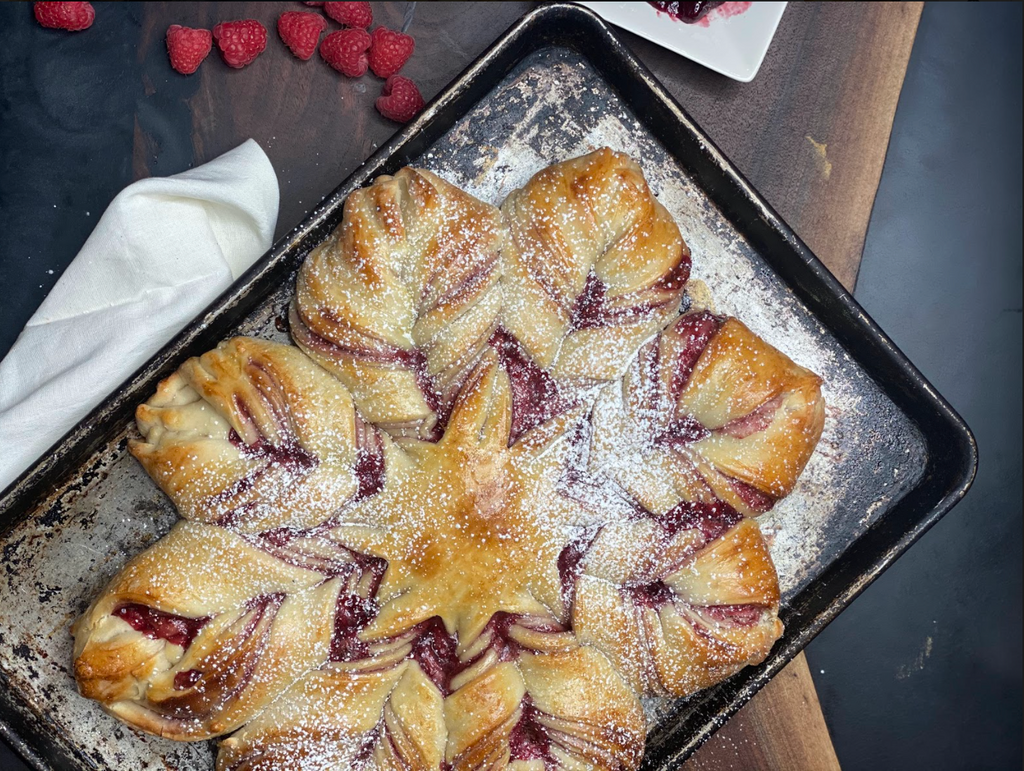
After the bread has had ample time to cool, dust with a sprinkle of confectioner’s sugar and enjoy your festive holiday treat!
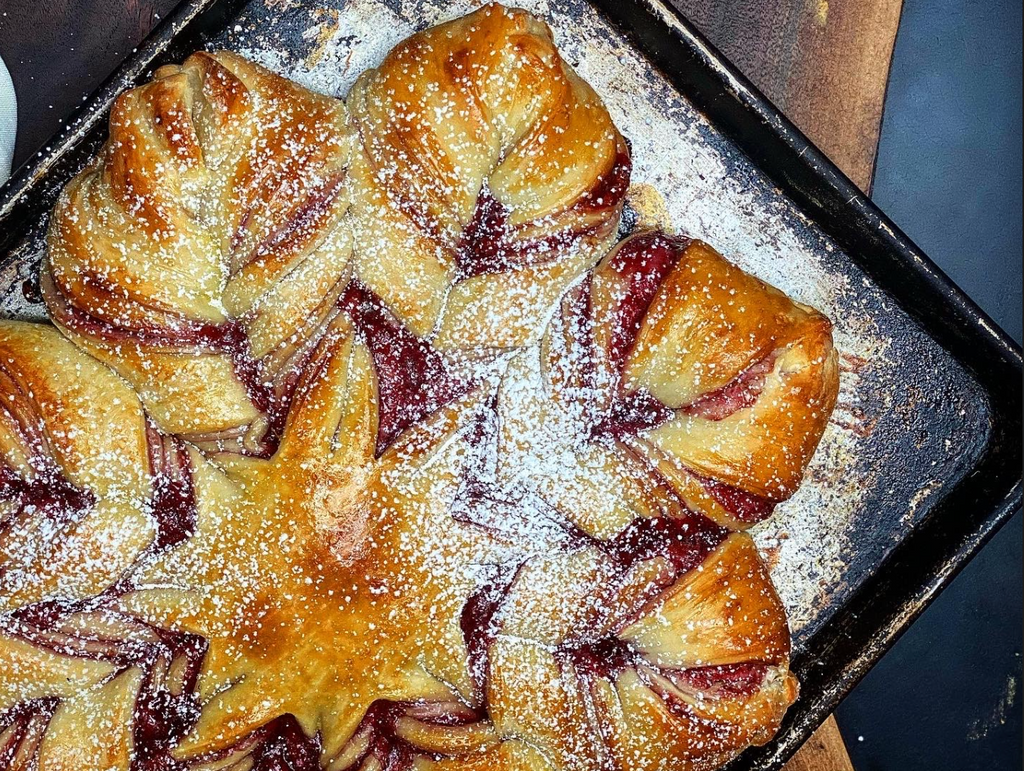
Table & Thyme’s Holiday Raspberry Star Bread
The perfect holiday pastry to accompany a comforting Christmas morning or evening!
Ingredients
- 1 package (¼ ounce) active dry yeast
- ¼ cup warm water (110° to 115°)
- ¾ cup warm 2% milk (110° to 115°)
- 1 large egg, room temperature
- ¼ cup butter, softened
- ¼ cup sugar
- 1 teaspoon salt
- 3¼ to 3¾ cups all-purpose flour
- ¾ cup seedless raspberry jam
- 2 tablespoons butter, melted
- Confectioner’s sugar
Directions
- Dissolve yeast in warm water until foamy. In another bowl, combine milk, egg, butter, sugar and salt; add yeast mixture and 3 cups flour. Beat on medium speed until smooth, about 1 minute. Stir in enough remaining flour to form a soft dough.
- Turn onto a floured surface; knead until smooth and elastic, 6-8 minutes. Place in a greased bowl, turning once to grease top. Cover and let rise in a warm place until doubled, about 1 hour.
- Punch down dough. Turn onto a lightly floured surface; divide into 4 portions. Roll 1 portion into a 12-in. circle. Place on a greased 14-in. pizza pan. Spread with one-third of the jam to within 1/2 in. of edge. Repeat twice, layering dough and jam, and ending with final portion of dough.
- Place a 2½ in. round cutter on top of the dough in center of circle (do not press down). With a sharp knife, make 16 evenly spaced cuts from round cutter to edge of dough, forming a starburst. Remove cutter; grasp 2 adjacent strips and rotate twice outward. Pinch ends together. Repeat with remaining strips.
- Cover and let rise until almost doubled, about 30 minutes. Preheat oven to 375°. Bake until golden brown, 18-22 minutes. (Watch during final 5 minutes for any dripping.) Remove from oven; brush with melted butter, avoiding areas where jam is visible. Cool completely on a wire rack. Dust with confectioners’ sugar.
We hope you enjoy this delicious holiday pastry with your loved ones. If you tried this recipe, we would love to hear your experience! Be sure to share with us on social media and let us know how it turned out!
For more information on Table and Thyme, contact them today! Follow us on our social media: Instagram, Facebook, LinkedIn and Pinterest to see the other amazing events, lavishing grazing tables and beautiful graze boxes we have created.
